Red velvet.
Love it or hate it.
I for one chose the former. Since beginning my life long affair with what is looking to be my valentine this year, Red Velvet and I have never parted ways. I worked out since receiving the recipe, it has been the choice of flavour for my birthday cake every second year. But I digress, I mean I could seriously talk for hours about devotion to this amazing flavour.
But on today's topic...
Fudge! Red velvet! Fudge!
The very mention of homemade fudge strikes fear into the bellies and hearts of even experienced bakers!! But I am always up for a challenge. I have made chocolate fudge before with my candy thermometer and it worked miraculously.
Today, I was not so lucky, I had to make two batches.
The first one was grainy though the flavour was supreme!! I was very bothered by my failure. No wonder people (of which I am one) use 'fudge' to express frustration.
I researched very thoroughly, what I did wrong and I did not do. I was on the prowl like a jealous girlfriend on Facebook. Looking through various blogs and posts.
Here is what I found:
Dissolve as much of the ingredients before commencing the boiling process!
Stir, stir, STIR
When the time come, don't stir, don't stir, DON'T even touch it
Beat it, Just beat, by hand that is, with a wooden spoon
All the other tips are in the recipe, adapted by me!
Enjoy!
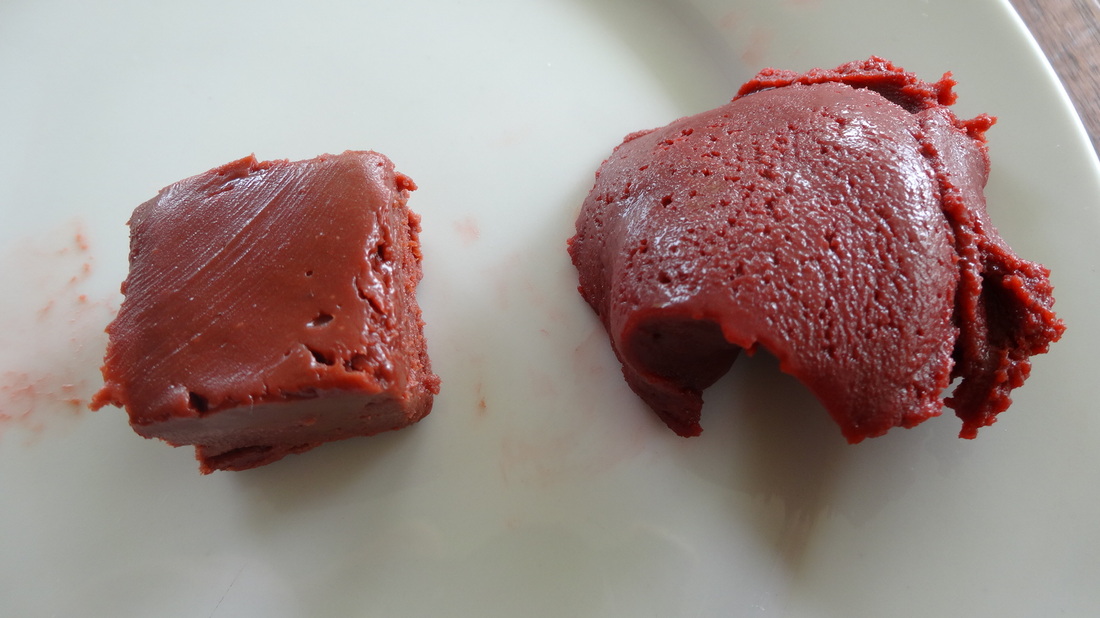
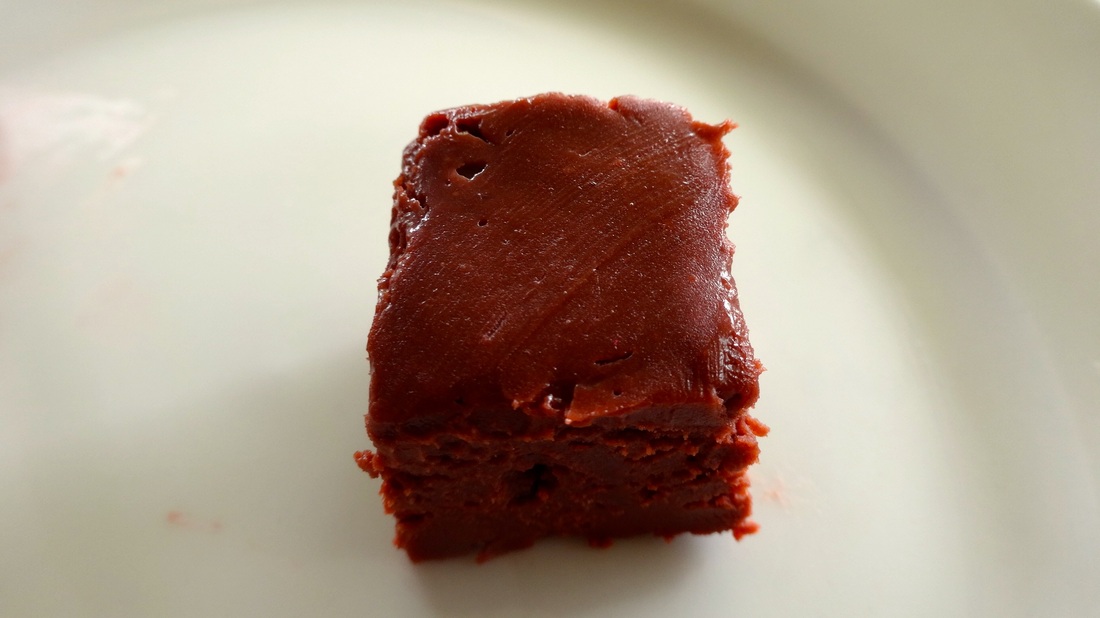
On the left: Good fudge - smooth texture, creamy, absolutely delicious
On the right: Not so good fudge - grainy, won't set (still tasted good though!!)
On the right: Not so good fudge - grainy, won't set (still tasted good though!!)
Red Velvet Fudge
Ingredients
· 2 cups white sugar
· 1/2 cup buttermilk
· 1 tsp red food coloring
· 1/4 cup cocoa
· 1/2 cup condensed milk
· 3 tablespoons butter
· 1 tsp vanilla
Instructions
1. Get out your small pan (this may be the smallest you have – I had to resort to a Tupperware container in my deficiency) and line with baking paper.
2. Mix the buttermilk and the sugar in a medium sized non-stick pan (without the heat on). Add in the red colouring and cocoa, making sure to thoroughly incorporate the ingredients together. Mix baby mix! We want to dissolve the sugar as much as possible.
3. At this point, please place your sugar thermometer in your pan (mine fastens to the side of my pan). It is important that it stays in one position so it can gage the temperature and so you don’t disturb the mixture at the later stages by reinserting it (experience is the best teacher, believe me).
4. Now bring your mixture to the boil by heating on a medium to high heat. STIR CONSTANTLY, not now and then, NOT every minute or so, CONSTANTLY. (So make sure you read the recipe so you don’t have to flitter back and forth from the stove – once again experience here people!)
5. We want the mixture to boil up to 238°F or 112°C otherwise known as the softball stage (mine was conveniently written on my thermometer).
6. Once the temperature has reached 238°F turn off the heat. And do not touch the pan UNDER ANY CIRCUMSTANCES. Seriously beautiful people, I implore you. Don’t touch it, stir it or eat it (it’s really hot!)
7. Allow the fudge to cool to 110°F, this is going to take time. Yes, wash the dishes, hang up the washing, email Aunt Gerta, etc. But remember… don’t touch it!
8. Once we have all waited patiently by not touching the mixture and it has reached 110°F, put the butter and vanilla on top of the mixture. Now swirl the butter and vanilla around the top of the mixture, encouraging it to melt but don’t incorporate it in.
9. Once the butter mixture is fairly melted (it doesn’t have to be all the way), use a long wooden spoon to mix the mixture (now you can touch it!). Mix vigorously, holding the pan at an angle, you may need a buddy to take turns. You are aiming to thicken up the mixture. Mix, mix, mix, bit of a workout, you’ll feel it in your upper arm. Every few minutes tilt the pan to see how thick the mixture is getting.
10. The mixture will thicken slightly after a few minutes of mixing. It might suddenly thicken up.
11. This is when we get a rubber spatula and all at once pour or encourage with difficulty in the prepared pan to set.
12. Allow to cool, 1-2 hours and BAM!! Yummy fudge!!
Other notes:
Mix by hand, don't mix with an electric beater – this is where I think I went wrong the first time!
Enjoy!!


 RSS Feed